
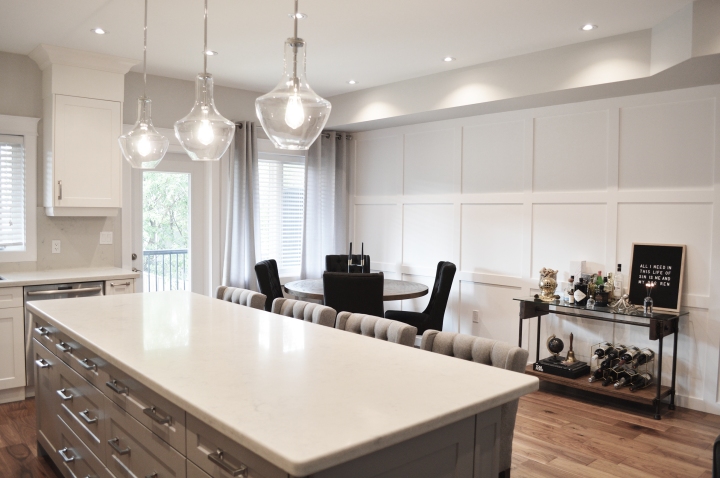
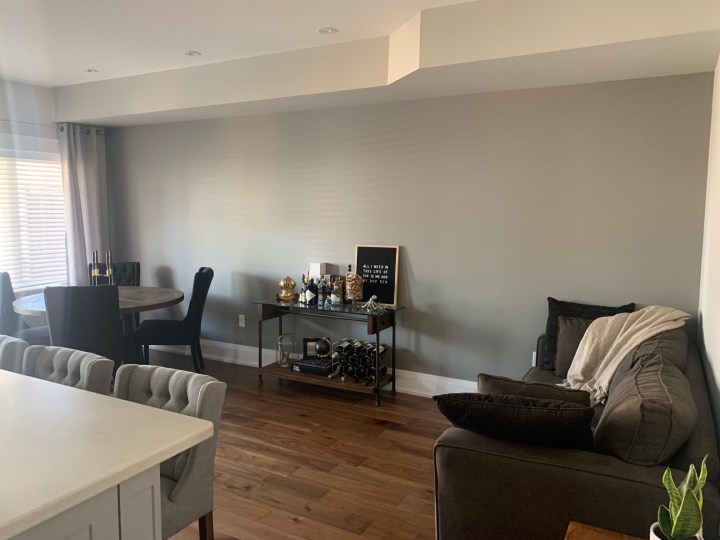
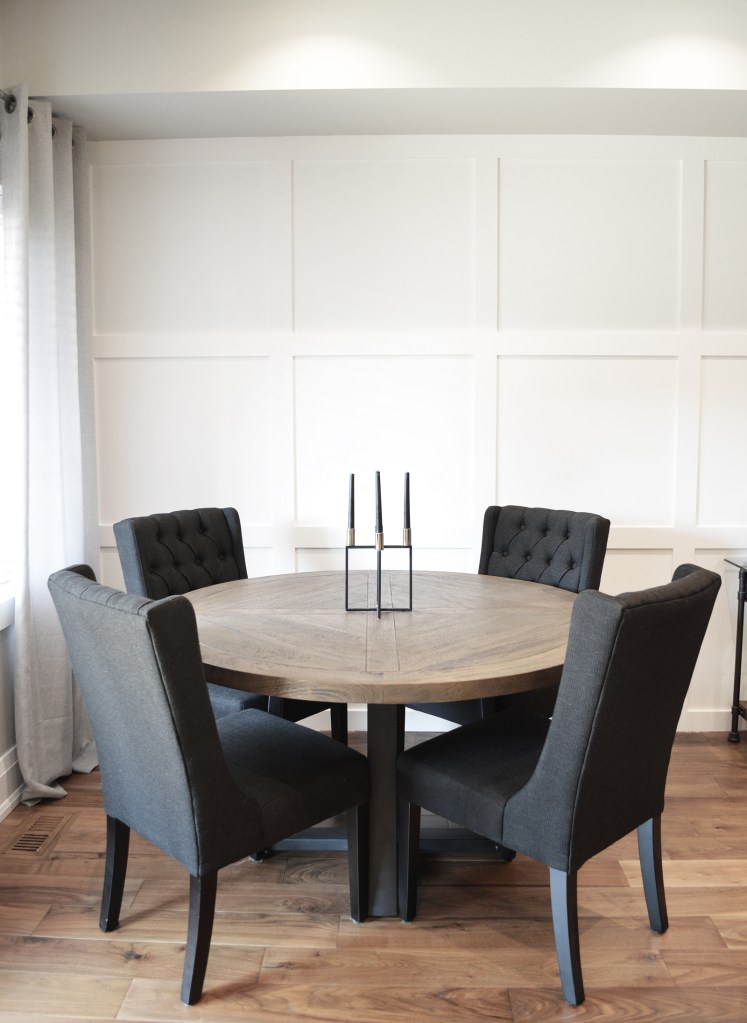
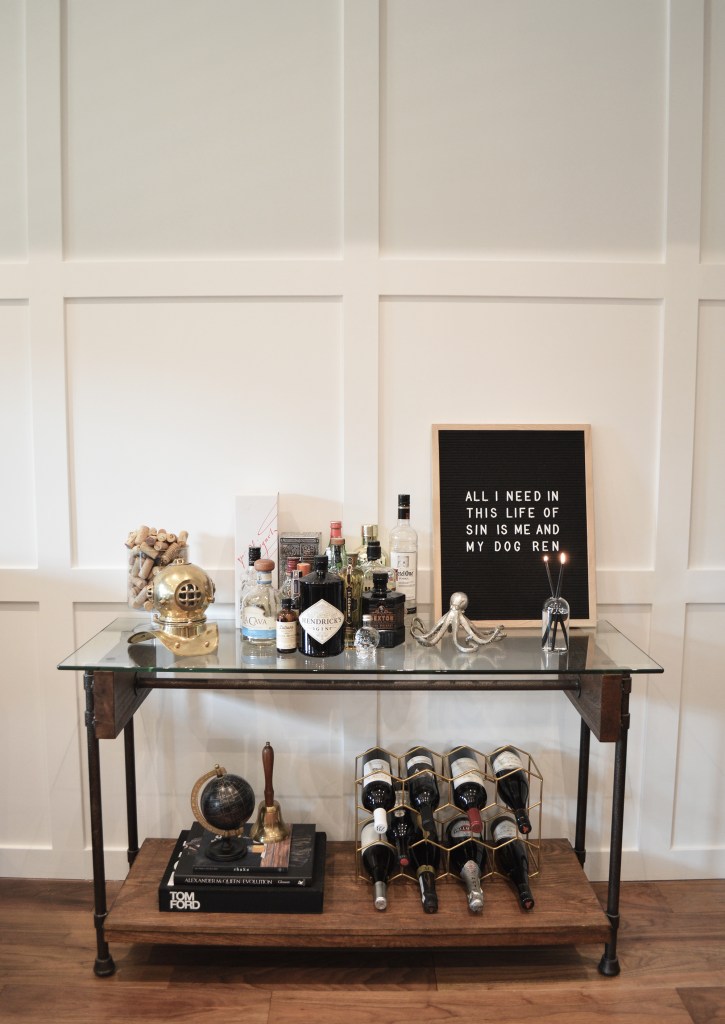
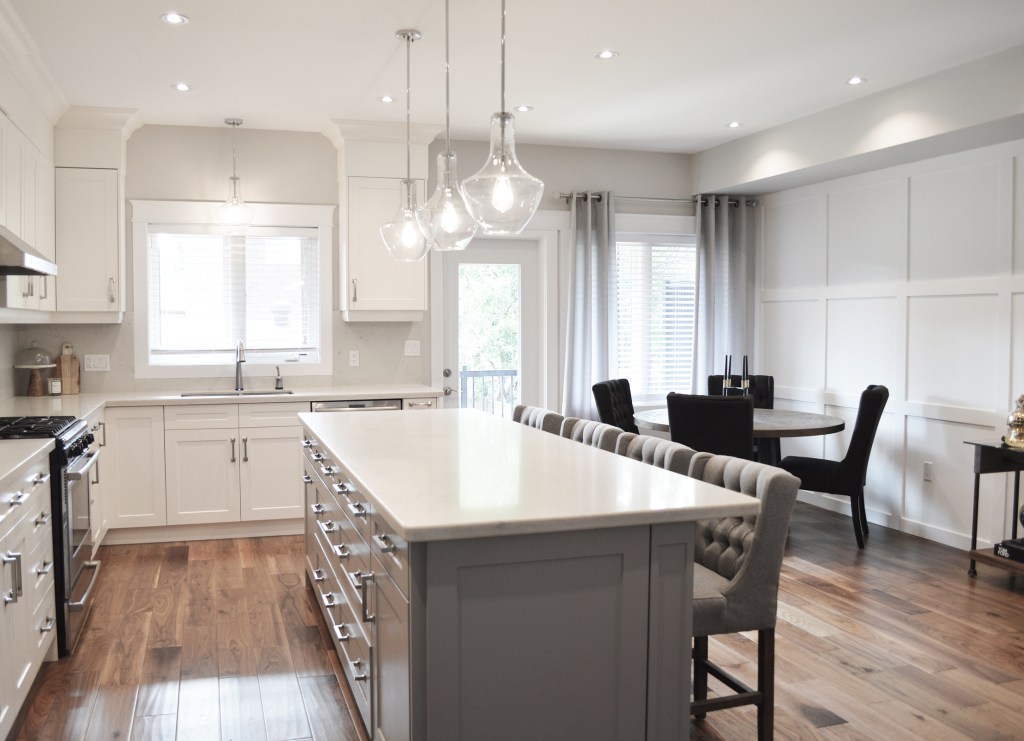
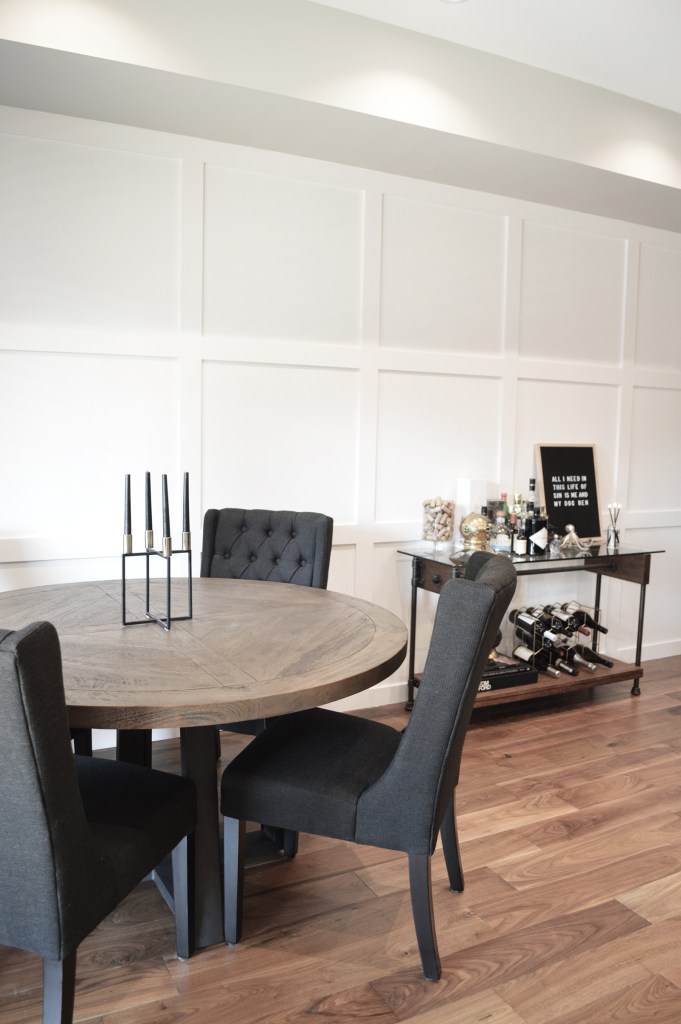
Instead of working on a blog post last weekend, I decided to tackle a home project that we’ve been meaning to do for weeks. Ever since moving into this house, I’ve hated the 19 foot long boring wall across from our kitchen. Because our house is tall and narrow, our main floor layout is a little awkward. Most of the space is taken up by the kitchen and a big 9 foot island that we love, but the rest of the space always just felt like a weird afterthought. I know, the couch doesn’t make it any less awkward – but we’re still on the hunt for a better seating solution and have focused our time (and budget) on other areas of the house. Back to the wall though – as you can see in the before picture below – it’s just bland. The dining, lounging and bar area all felt super disconnected. I didn’t want to hang any art because we’re still working on the furniture layout. I knew I couldn’t convince Matt to paint the whole kitchen white – but I knew I could convince him to do something to this space if he was able to use his power tools. That’s when I decided to reel him in and convince him to do a board and batten grid feature wall to add some depth to this space.

During the second week of lockdown, Matt and I ordered all of the materials we’d need to create the board & batten grid wall from Home Depot. We figured since we were both home in quarantine, it would be a great time to finally tackle the project. If I had known the shipping would have taken 8 weeks, I probably would have opted for curb side pick up… Hindsight is 2020 – but we were amid a pandemic, so I’m not going to complain about that too much. Even though we did it three weeks after I went back to work and spent the better part of a weekend doing it, I’m happy that we put some time into the space because it is incredible how different the whole space feels now.

Since I’ve been asked so many questions about how we did it and what we used, I thought I’d share the process here.
Materials We Used

Primed MDF Moulding $39.99/pack | Elmer’s Interior Wood Filler $10.57 | Zinsser Bulls Eye Primer $29.97 | Behr Premium Plus Interior Flat Latex Paint – Ultra Pure White $38.97| LePage PL 200 Drywall & Paneling Construction Adhesive $10.47 | DAP Alex Flex Premium Moulding & Trim Caulking (Paintable White) $4.47
Tools/Equipment/Materials We Already Had
- Brad Nailer & Air Compressor ( though I’ve seen lots of posts where people have used this Ryobi Cordless Brad Nailer )
- Laser Level & Tripod
- Mitre Saw
- Caulking Gun
- Paint rollers, brushes, painters tape & other painting supplies
- Sandpaper and Sanding Block
The Steps We Took
The first step was measuring the wall. Because of the length of the wall, I preferred the look of larger squares (28 x 28ish) because I felt anything smaller would look too busy. Since I use AutoCAD for my job and design work – figuring out the spacing and making our plan was easy.

Our next step was to remove the baseboard – this isn’t something you have to do, but I wanted all the moulding on the wall to be the same height. After we took the baseboards off, we primed and painted the wall. We didn’t worry about cutting the edges because we knew the moulding would give us coverage.

After the wall was painted, we installed the two vertical end pieces first using the laser level to ensure they were installed square. Then we continued to install the top and bottom pieces to create a frame around the wall.
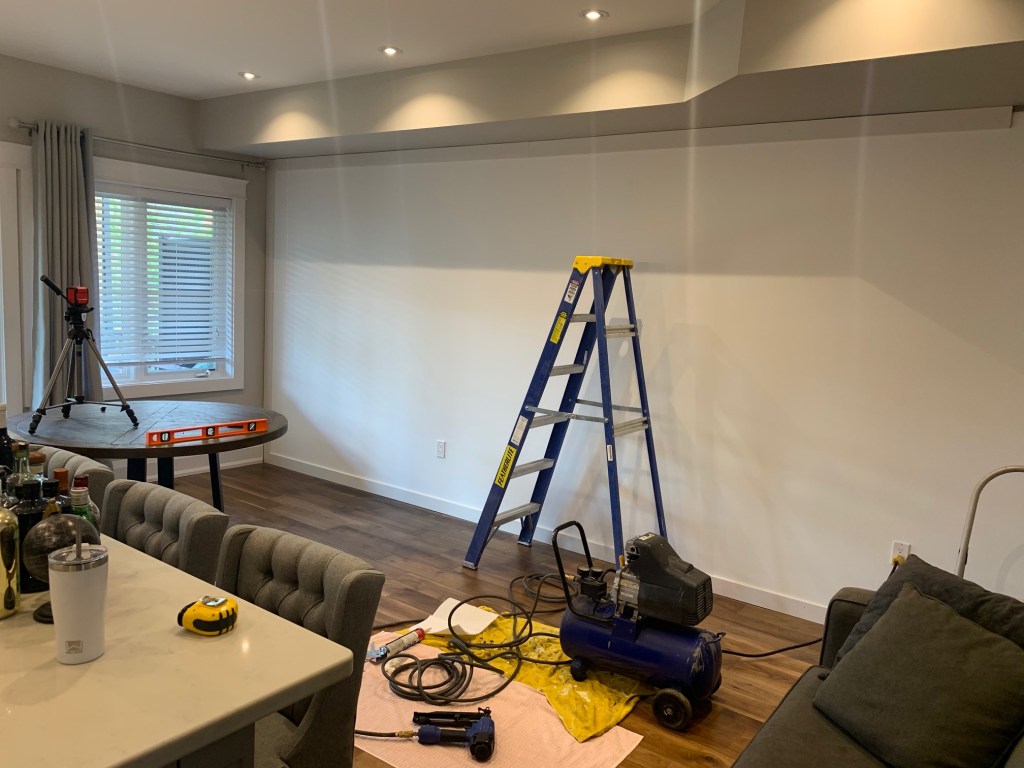
After the frame was done, we installed the vertical pieces first before creating a line with the laser level to install the horizontal pieces.

After we had all of the pieces installed, we used wood filler to fill all of the joints and nail holes. After the wood filler dried, we sanded down all of those areas (the worst part of the whole process) then primed them.


After priming those joints, we applied the paintable trim sealant/caulk to all of the areas where the moulding met the drywall (inside each square, at the ceiling and at both sides. Because the MDF was pre-primed, it only took two coats of paint on the trim to finish off the project.

Altogether, the materials we used cost us about $200. The project took the better part of the weekend, but a lot of that was also drying time between filling, priming, caulking and painting as well. We’re so happy with how the wall turned out – it completely elevated the whole space. Doing a feature wall like this is a great way to add character and impact to the space without a huge hit to the budget.
Have you wanted to tackle a project like this around your home? Have you done something similar?


One thought on “Our DIY Board and Batten Grid Wall”